Basic Image Operations
Theory
Digital image processing often begins with a set of basic operations that form the foundation for more advanced techniques. In this example, we explore some of the most essential functions provided by OpenCV, a powerful computer vision library.
1. Loading Images in Different Modes
Images can be read in multiple formats depending on the task:
- Color mode (default): preserves full RGB information.
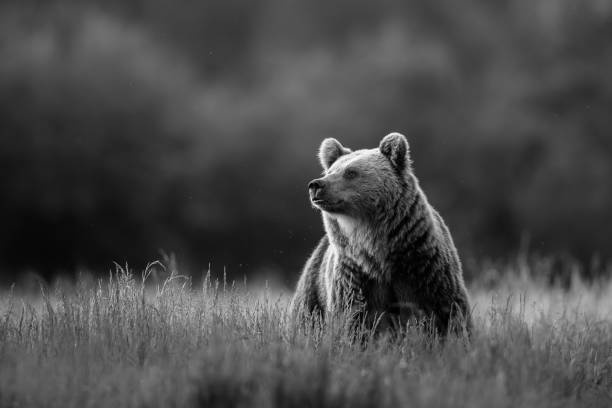
- Grayscale mode: reduces the image to a single intensity channel, useful for feature extraction and reducing computational cost.
- Unchanged mode: loads the image as-is, including the alpha channel (transparency).
2. Inspecting Image Properties
Each image in OpenCV is represented as a NumPy array. By checking its shape (rows × columns × channels), we gain insight into its dimensions and color depth.
3. Resizing Images
Images can be resized in two ways:
- Absolute resizing: specifying the exact pixel dimensions (e.g., 400 × 400).
- Relative scaling: resizing proportionally using scale factors (fx, fy), such as reducing the size to 50%.
4. Rotating Images
Image rotation is a common geometric transformation. Here, we demonstrate a 90° clockwise rotation, but OpenCV supports arbitrary rotation angles as well.
5. Displaying and Saving Images
OpenCV enables visualization of processed images in separate windows. Additionally, images can be saved to disk for later use in projects or reports.
Through these simple yet fundamental operations, you gain the building blocks to manipulate images for a wide variety of computer vision applications — from preprocessing datasets to preparing images for deep learning models.
Python Code
import cv2
import numpy as np
# Load an image
# cv2.IMREAD_COLOR (-1): Load a color image (default)
# cv2.IMREAD_GRAYSCALE (0) : Load in grayscale
# cv2.IMREAD_UNCHANGED (1) : Load with alpha channel
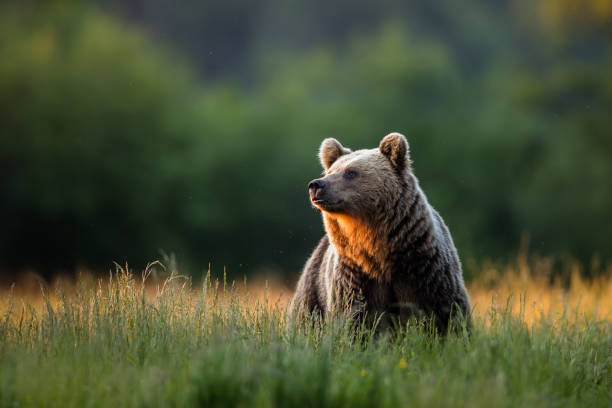
img = cv2.imread("assets/bear.jpg")
print("Image shape:", img.shape) # (rows, cols, channels)
# Convert to grayscale
gray_image = cv2.cvtColor(img, cv2.COLOR_BGR2GRAY)
# Resize the image
# Method 1: Absolute size
# img_resized = cv2.resize(img, (400, 400))
# Method 2: Relative scaling (50% of original size)
img_resized = cv2.resize(img, (0, 0), fx=0.5, fy=0.5)
# Rotate the image (90° clockwise)
img_rotated = cv2.rotate(img_resized, cv2.ROTATE_90_CLOCKWISE)
# Display images
cv2.imshow("Original", img)
cv2.imshow("Grayscale", gray_image)
cv2.imshow("Rotated + Resized", img_rotated)
# Save processed image (optional)
# cv2.imwrite("bear_processed.jpg", img_rotated)
cv2.waitKey(0)
cv2.destroyAllWindows()
Output Example
Below are sample outputs after applying the basic operations: